Playground Guide
Follow these four steps in the current Playground. Screenshots and walkthroughs updated October 8, 2026.
View the full Playground screenshotFor Seedance 2.0, any reference image or video that contains a human face must be uploaded to the asset library first, then used as a prepared asset in generation.
Open the Playground
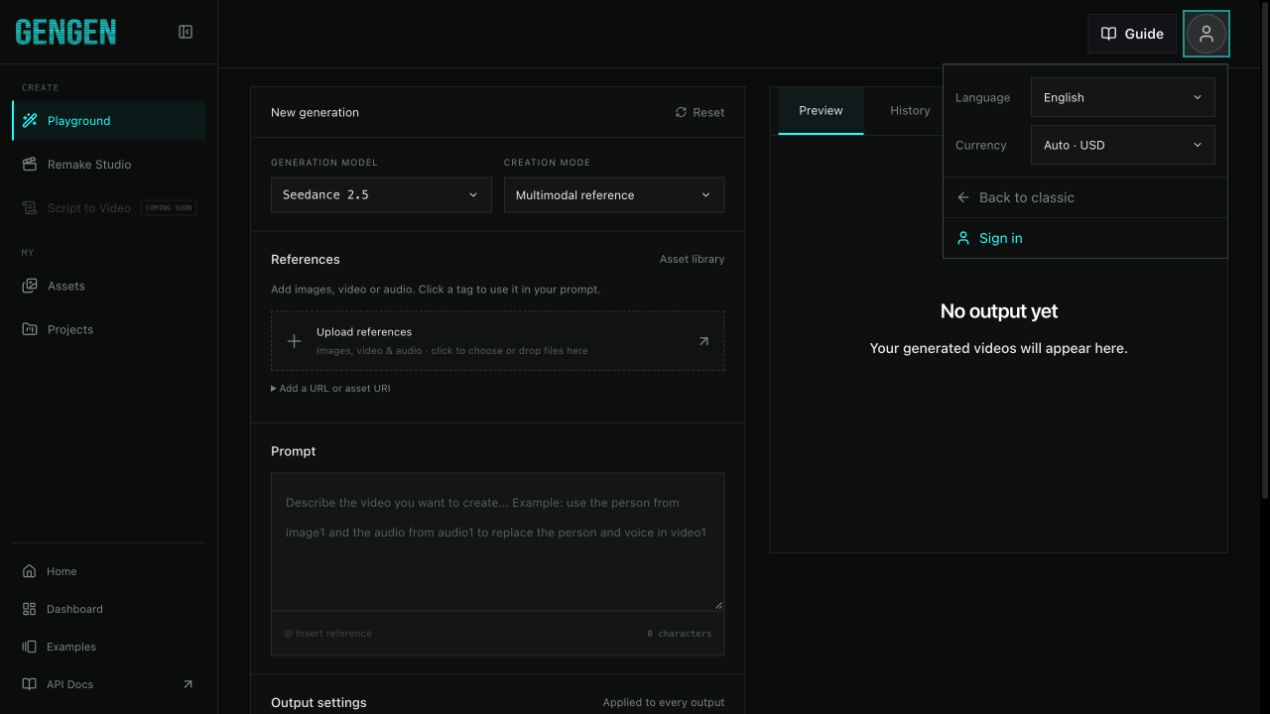
Open the Playground. Use the avatar in the top-right corner to sign in. Once signed in, open the same menu to check or refresh your credits and top up. Language, currency, and Back to classic are also in this menu.
Language and currency follow automatic defaults until you choose an option. Your explicit choice is remembered; select Auto to return to automatic selection. Currency changes the displayed estimate only — billing remains in USD.
Pick a mode and output settings
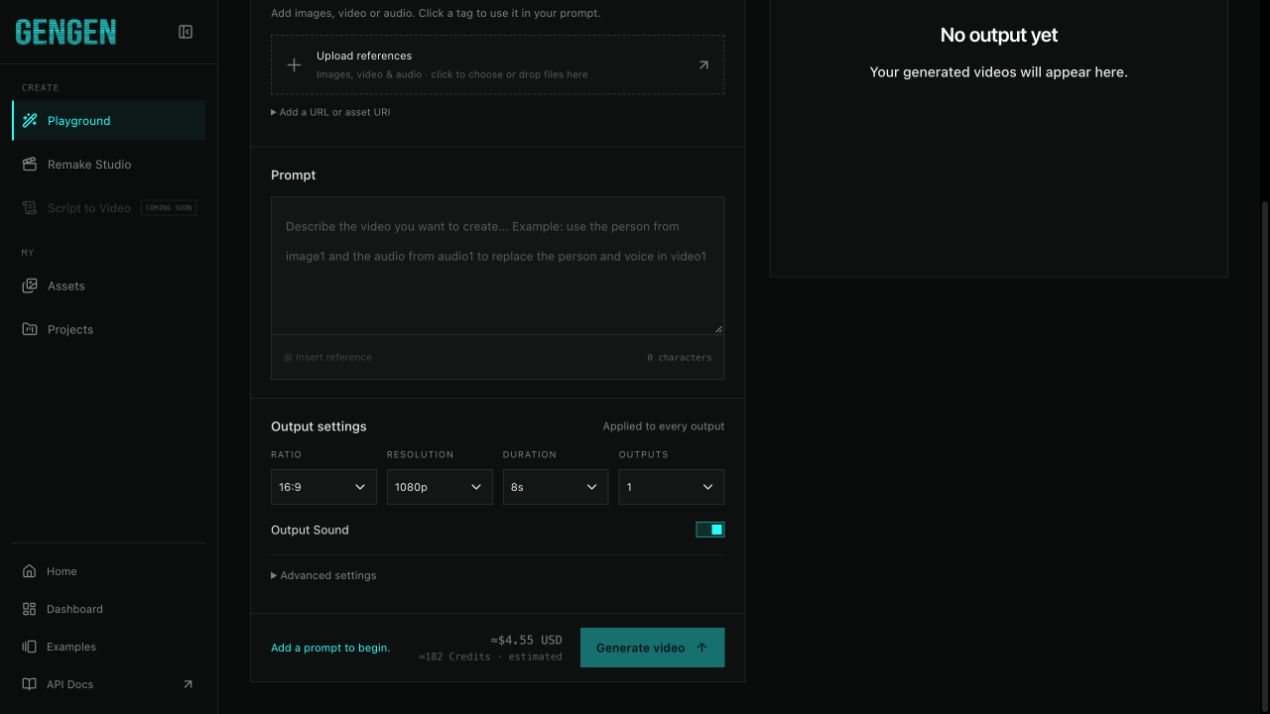
Select a Generation model, then a Creation mode. The walkthrough uses Seedance 2.5 with Multimodal reference. Scroll to Output settings to choose the ratio, resolution, duration, number of outputs, and Output Sound. Available controls depend on the model.
View output settings screenshot
Upload reference assets
Select Upload references or drag files into the References area. The accepted media depends on your model and mode. Click a thumbnail to preview it; click its tag to insert it into the prompt. The walkthrough uses an image and its @image_1 tag.
For saved references, open Asset library and choose an available asset. Sign in to access your library. For Seedance 2.0 references containing human faces, prepare the asset in the library first and wait until it is ready before using it.
Write your prompt and generate
Type your prompt in the input area. Once you've attached reference assets in Step 3, you can refer to them inside the prompt with their tags — for example @image_1, @video_1 — instead of describing them by name.
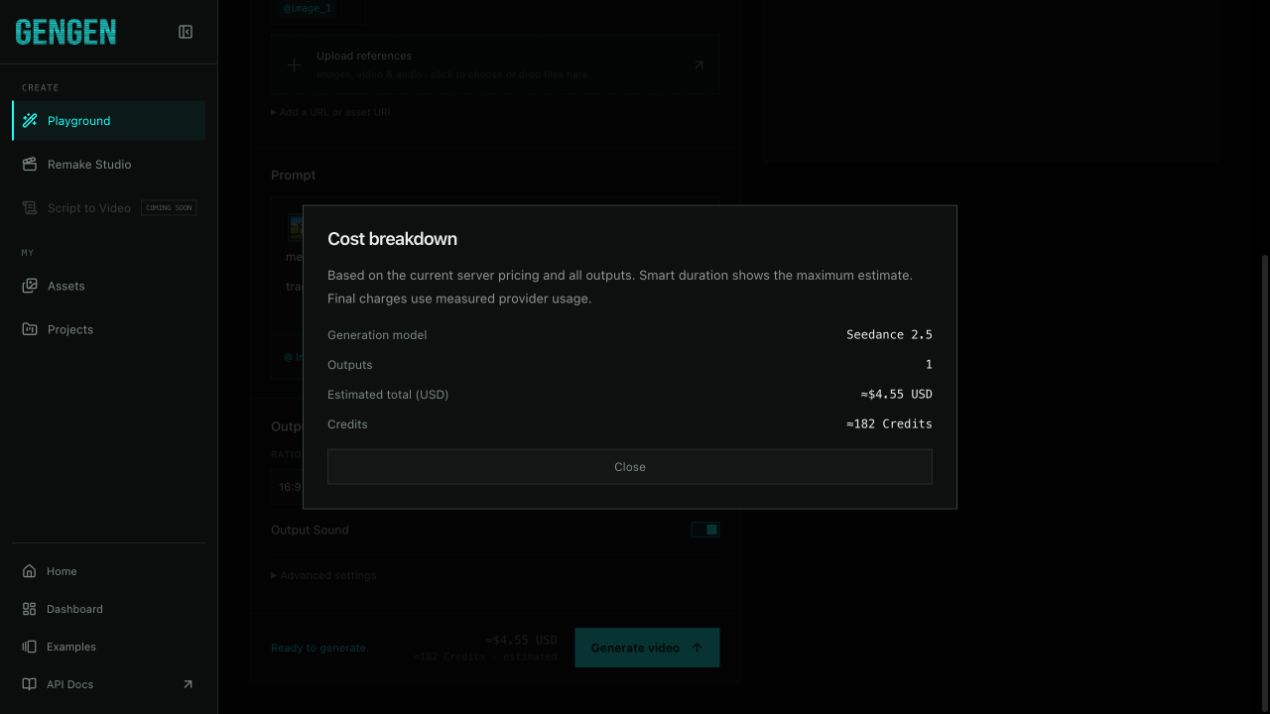
Describe the action, camera movement and visual style. Review the estimated amount beside Generate video; click it for a cost breakdown. Smart duration shows a maximum estimate. Final charges depend on measured usage.
View cost breakdown screenshot
Sign in and select Generate video when ready. Results appear in Preview. Open History and click a task row or its arrow to expand or collapse its details. This walkthrough stops before submission; the example estimate is illustrative, not a fixed price.
Helpful tips
Prompting patterns, common pitfalls, and ideas to get better results.